
Connect to Receipt Printer

1. Plug the RJ12 connector cable (the one that looks similar to a phone line) from the cash drawer into the receipt printer.
2. Tick the Cash Drawer checkbox
3. Click the ‘Test Open’ button to check if it is working.
Connect to Serial Port
1. Prepare a Cash Drawer trigger.

2. Connect the trigger to computer
- One end of the Box has a USB-B port, plug the USB cable into that end

- The other end is a Standard USB-A connector. This plugs into one of the USB Ports on computer
- The Cable which comes from the Cash Drawer has the RJ12 connection. Which looks like a Phone cable. Plug that into the connection on the black box

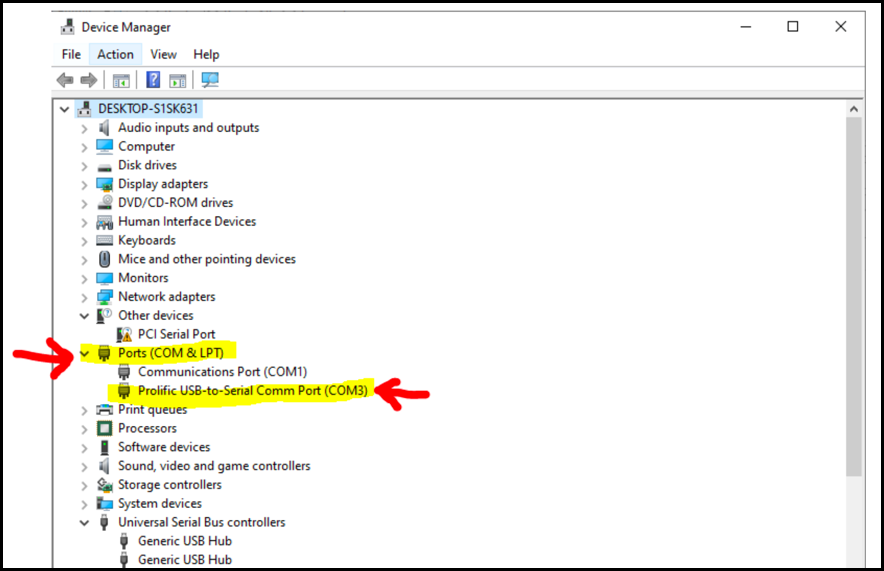
3. Check the Serial Port on Control Panel
- Go to CONTROL PANEL
- Click on DEVICE MANAGER
- Click on the PORTS (COM & LPT) as in below picture
- There should be one listed as “Prolific USB-to-Serial COMM Port” as highlighted below
- Note down what COM number is has in brackets. The below example is COM3
4. Set up the cash drawer on screen
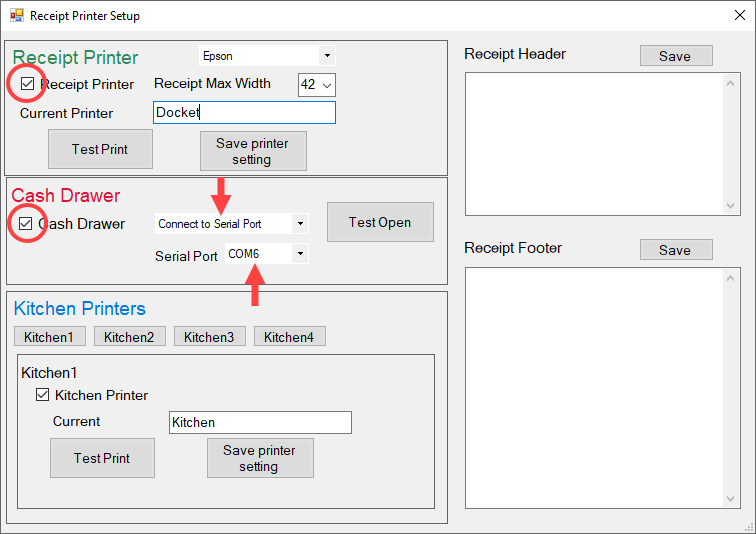
- Make Sure RECEIPT PRINTER box is UN-TICKED
- Make sure CASH DRAWER box is TICKED
- Make sure CONNECT TO SERIAL PORT is selected in the drop down field
- In the SERIAL PORT FIELD, select the COM Port which was displayed on the previous page in DEVICE MANAGER (our ex- ample was COM 3, yours will most likely be a different COM Port)
- Then press TEST OPEN, and the Cash Drawer will fire open